We’ve been busy sprucing up our new wordpress theme for the relaunch of themesforge.com and finally got around to adding thumbnails functionality to our postss. Now I know there are many many different ways to do this, from dedicated plugins to using custom fields.
Well since WordPress 2.9 this is now an optional feature within wordpress itself which is great news for anyone looking to add this to their wordpress powered website. Hopefully it will mean that in the near future all wordpress themes will support this functionality. We will certainly be pushing for it’s adoption on all wordpress themes we see – and we’ll be keeping an eye out for it!
So what’s the skinny on it? Well it’s pretty simple to activate and it’s running on our blog now.
There are 2 excellent posts which give you the full lowdown and this new feature. The first is from WordPress Lead Developer, Mark Jaquith who provides the basics to get you up and running in a few minutes. The second is from Jason Tadlock who builds on Mark’s post and deals with some of the ways which you can stretch this new functionality if you wish to. So if you want to get the full lowdown and the showdown on this new wonderful feature be sure to check out those posts.
If you just want the absolute minimum to get you up and running with your new native wordpress post thumbnails functionality, these are the steps I took.
Step by Step Instructions for adding native wordpress post thumbnails functionality to your blog.
Add the following code snippet to your functions.php file
[codesyntax lang=”php”]
/* switch on support for post thumbnails - WordPress 2.9 onwards */

if ( function_exists( 'add_theme_support' ) ) { // Added in 2.9
 add_theme_support( 'post-thumbnails' );
 set_post_thumbnail_size( 200, 200, true ); // Normal post thumbnails
 add_image_size( 'hp-post-thumbnail', 200, 200, true ); // Homepage thumbnail size
 add_image_size( 'single-post-thumbnail', 300, 9999 ); // Permalink thumbnail size
}
[/codesyntax]
The code snippet above first checks to see if you’re using 2.9 or greater (and if you’re not why not? get it now!). It then add support for post-thumbnails. The next line sets a default set for all thumbnails to be 200*200 pixels. You can adjust this to your liking. The next line then declares a specific value for homepage thumbnails – again 200*200 but this time with the additional value of true which will hard crop whatever image you upload to be 200*200 which is great for uniformity on your homepage but may lead to some images cutting off in a manner you don’t like. It’s worth experimenting – it works just fine for us. The last line declares a different thumbnail size for our permalink post pages of 300*9999 which will mean we get a nicely proportioned thumbnails which are a bit bigger and width a variable height on the permalink page.
Then we move on to your index.php file in your theme. Within your posts loop find a place where you would like to display your thumbnail and add the following code snippet:
[codesyntax lang=”php”]
          <?php if ( function_exists( 'add_theme_support' ) ) : ?>
		  <?php if ( has_post_thumbnail() ) : ?>
			<div class="postthumb">
			<?php the_post_thumbnail( 'hp-post-thumbnail' ); ?>
            </div>
 			<?php endif; ?>
            <?php endif; ?>
[/codesyntax]
This code will first check to make sure you’re using wordpress 2.9 (special notice to all theme authors – make sure you add this line to your theme if you don’t want to break those still using legacy versions of wordpress!). It will then check to see if there is indeed a thumbnail for the current post. We then add a div around the call to the actual thumbnail (which we then have a sprinkle of CSS in our style.css file to float the image left in our post.)
[codesyntax lang=”css”]
.postthumb {
	float: left;
	width: auto;
	margin: 0 20px 10px 0;
}
[/codesyntax]
In your single.php file you will need to add a very similar snippet to what you added to index.php with one important difference – see if you notice what’s different:
[codesyntax lang=”php”]
<?php if ( function_exists( 'add_theme_support' ) ) : ?>
            <?php if ( has_post_thumbnail() ) : ?>
			<div class="postthumb">
            <?php the_post_thumbnail( 'single-post-thumbnail' ); ?>
            </div>
            <?php endif; ?>
            <?php endif; ?>
[/codesyntax]
Yes kids it’s the call to single-post-thumbnail instrad of hp-post-thumbnail.
Ok that’s the heavy lifting done in terms of your theme code.
Now jump into your post edit page in thew WordPress admin.
You will notice down the bottom right you now have a new option called “Post Thumbnail” which should look like this:
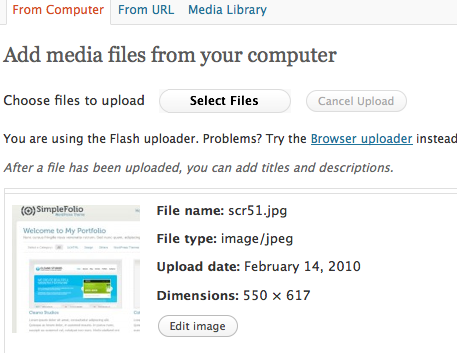
Go ahead and click on “Set Thumbnail” to open the image upload facility. Here’s the really important bit – once you’ve uploaded your image don’t click on “Insert into post” option – click on “Use as thumbnail” option instead.
And you’re done!
It’s as simple as that. I hope you find this quick post useful. It’s great that this feature is now part of the wordpress core. Anyone looking to port across from the custom field method to this newer method should checkout the Get the Image plugin
– it rocks.


Leave a Reply